

原文链接:https://mp.weixin.qq.com/s/gL3uwbn_lUCZjiL4KQZFPg
本文以 VMware vCenter Server Appliance (VCSA)7.0U3 升级到 8.0U3 为例,详细介绍 vCenter Server 升级的每个步骤。主要包含六部分:升级过程概述、注意事项、准备阶段、第一阶段部署、第二阶段部署以及升级过程遇到的常见问题。(本文共计2192个字,预计阅读时间10分钟)
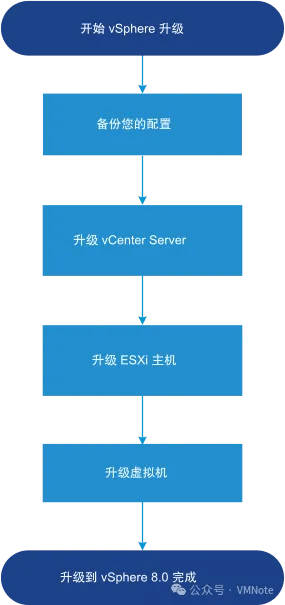
VCSA升级过程概述
vCenter Server Appliance 的升级是从旧版本迁移到新版本的过程,包括部署一台8.0版的新vCenter Server Appliance ,并为其分配一个临时 IP 地址,以便将配置和服务数据从旧vCenter Server 迁移到新vCenter Server上。完成迁移之后,旧vCenter Server的IP地址和主机名将应用于新vCenter Server上。升级结束时,会释放临时 IP 地址并关闭旧vCenter Server。
VCSA升级注意事项
- 升级有风险,一定要做好快照和备份
- 强烈推荐使用 域名(FQDN)而不是纯IP地址的方式部署 vCenter Server。后者在日常使用以及升级版本期间会遇到非常多的问题。因此如果现有环境是使用IP部署的,强烈建议参考 VMware 博客,将现有vCenter Server 改为域名(FQDN)的方式后再进行升级。https://blogs.vmware.com/vsphere/2019/08/changing-your-vcenter-servers-fqdn.html
- 整个升级过程预计要 2小时 左右,因此请预留好维护时间。
VCSA升级的准备阶段
第1步,访问 VMware 产品互操作性网站,在升级路径(Upgrade Path)选项卡中,确认vCenter Server可以从7.0U3的版本升级到8.0U3的版本。(https://interopmatrix.broadcom.com/Interoperability)

注意:如果现有环境的vCenter Server 是6.5或更早版本的版本,那么必须先升级到6.7或7.0版后,才能升级到8.0的版本。详见 VMware 手册说明:
要升级 vCenter Server Appliance 版本 6.5 或更早版本,必须先升级到版本 6.7 或 7.0,然后再升级到版本 8.0。有关将 vCenter Server Appliance 6.5 升级到版本 6.7 的信息,请参见《VMware vSphere》6.7文档。有关将 vCenter Server Appliance 6.5 升级到版本 7.0 的信息,请参见《VMware vSphere》7.0文档。有关 vCenter Server 升级兼容性的信息,请参见《VMware 兼容性指南》
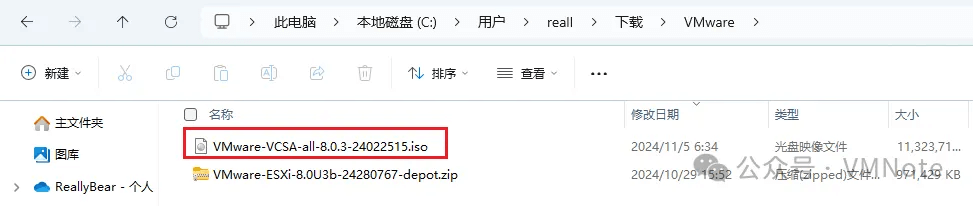
第2步,下载VMware vCenter Server Appliance(VCSA)8.0U3的ISO安装包,具体步骤参考:《如何在博通官网下载VMware vCenter Server》
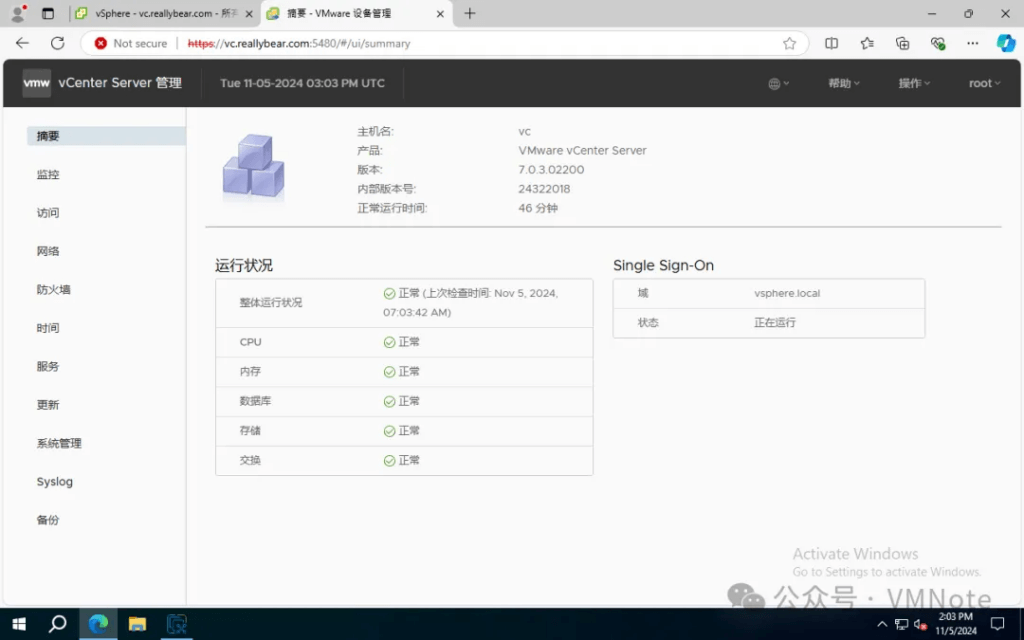
第3步,访问现有vCenter Server 的客户端(vSphere Client)以及 vCenter Server 管理界面(VAMI,vCenter Server Applicance Management),对现有的 vCenter Server 7的健康状态进行检查,确保没有任何警告或报错。若存在警报或者错误情况,必须先解决这些警报或错误后才能进行升级操作。
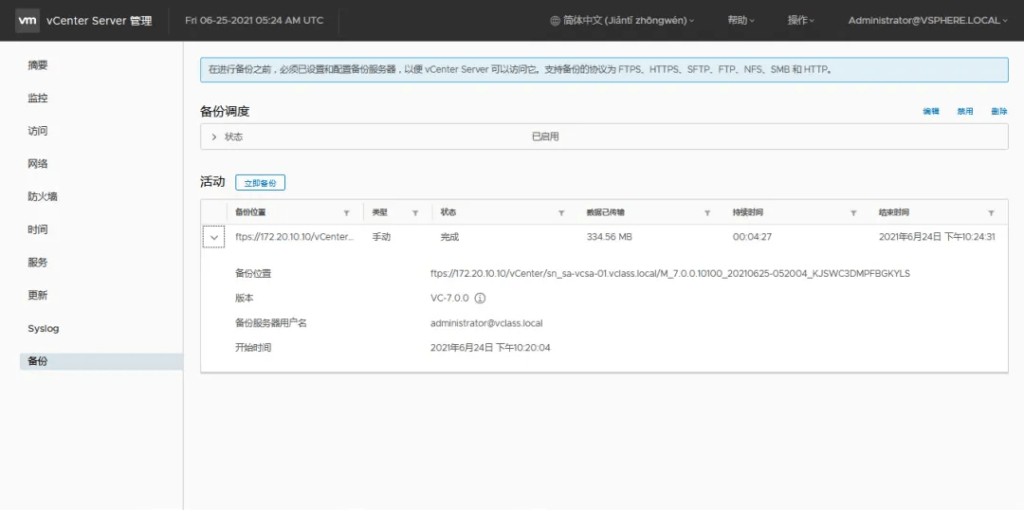
第4步,备份现有 vCenter Server 7 的文件, 具体步骤参考:《如何备份VMware vCenter Server Appliance(VCSA)的文件》
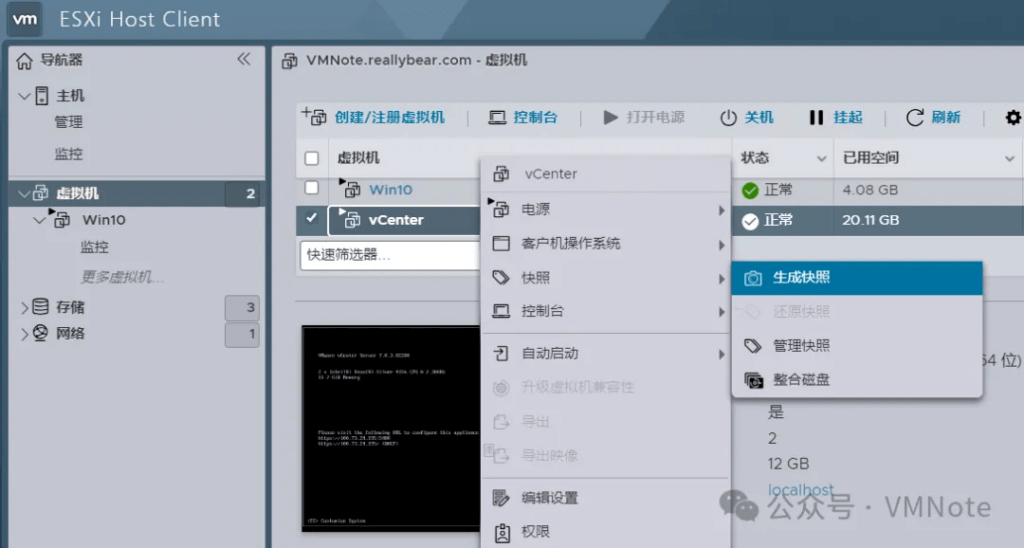
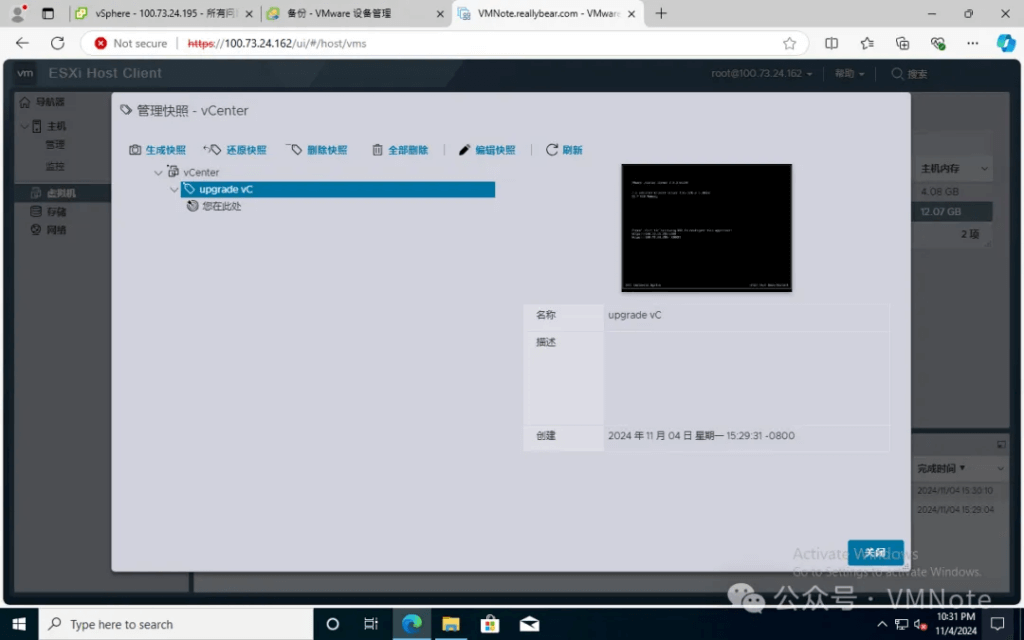
第5步,访问现有 vCenter Server 7 所在ESXi主机的客户端(Host Client),对 vCenter Server 7 这台虚拟机做快照
第6步,准备一个与现有 vCenter Server 7 同网段且未使用的临时IP地址,以便用来部署vCenter Server 8的虚拟机。
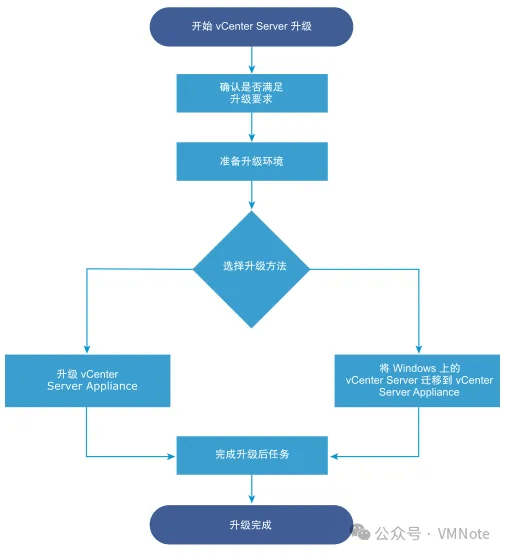
VCSA升级的第一阶段
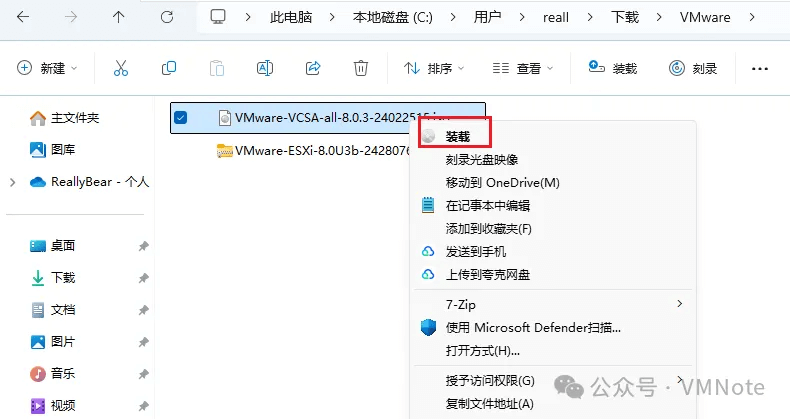
第1步,在个人电脑上将下载好的VMware vCenter Server Appliance(VCSA)的ISO文件用虚拟光驱挂载或者解压
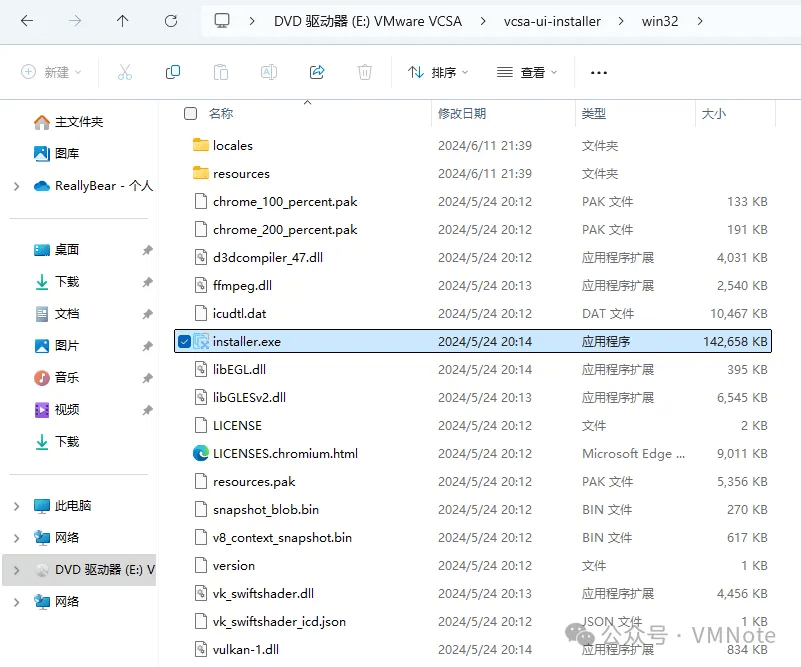
第2步,找到VMware VCSA/vcsa-ui-installer/win32文件夹下的intaller.exe文件,双击运行
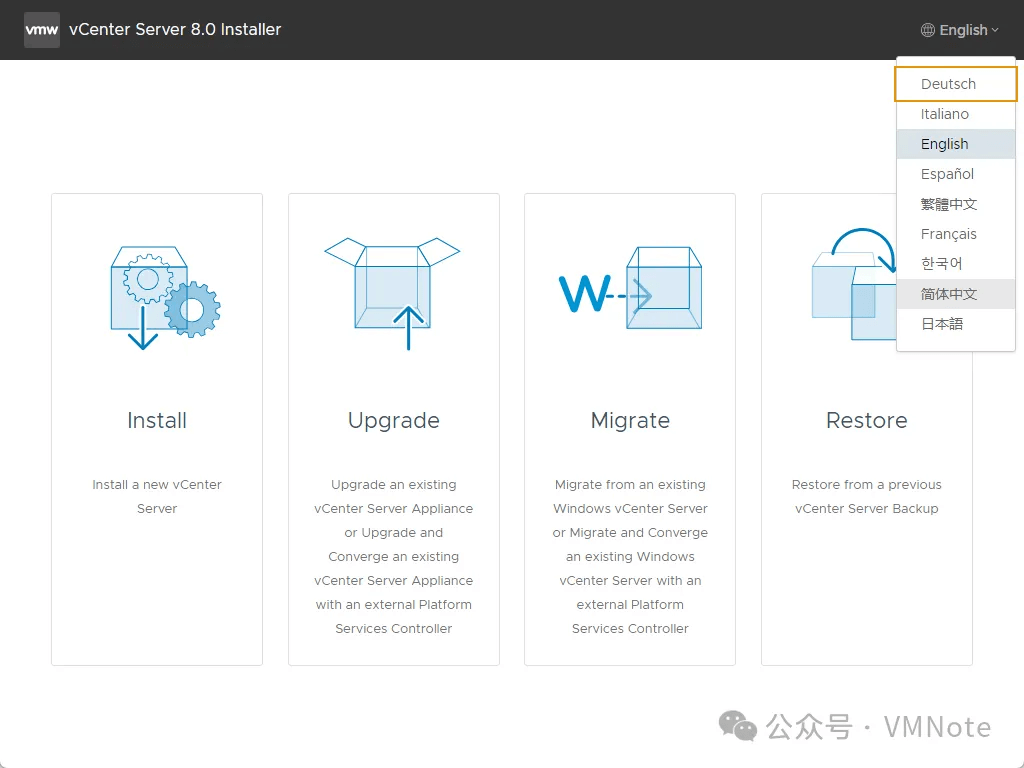
第3步,在弹出的vCenter Server安装向导页面,默认显示的是英文,点击右上角的下拉菜单将其改为简体中文
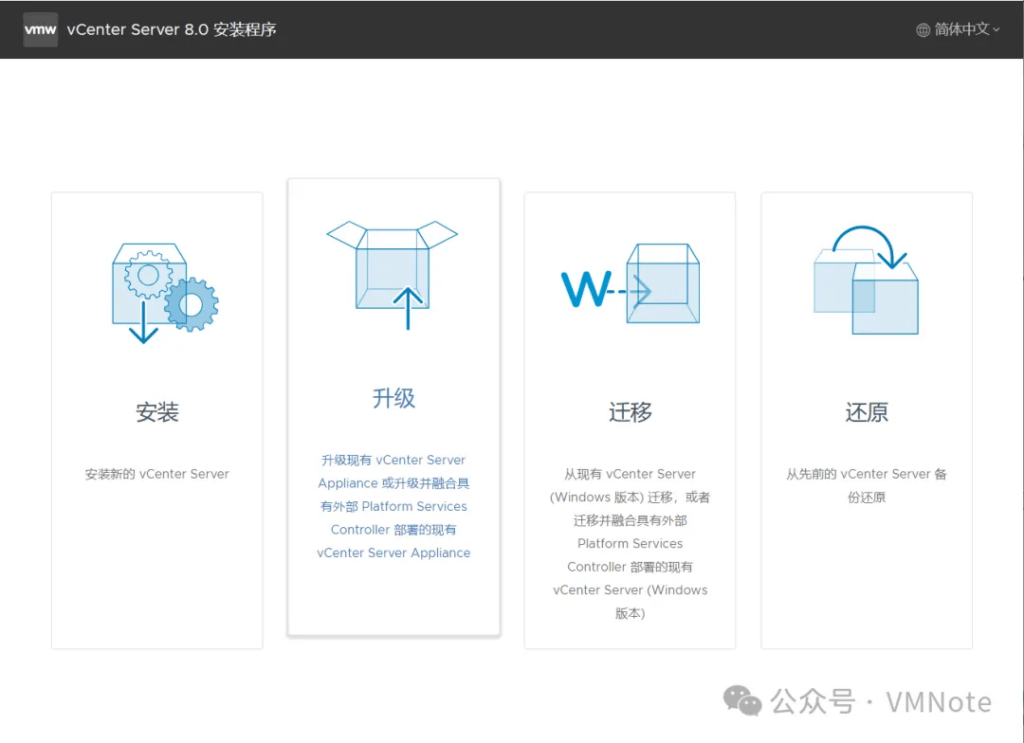
第4步,在 vCenter Server 安装程序 页面,点击 升级 选项
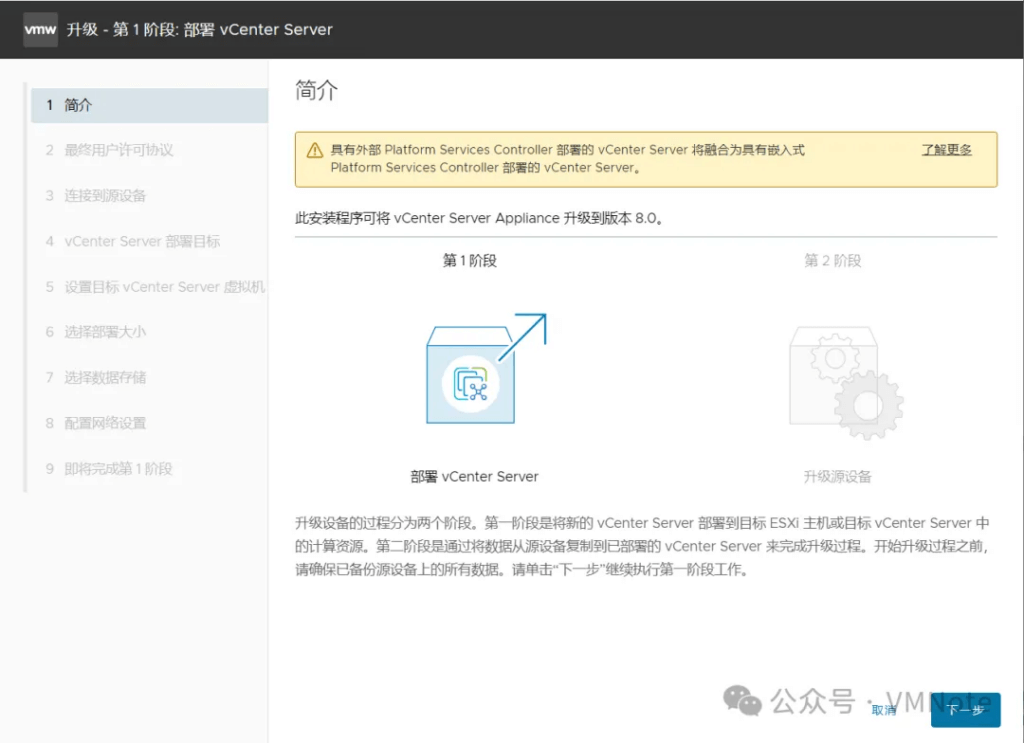
第5步,在 简介 页面,提示安装分为两个阶段,点击 下一步
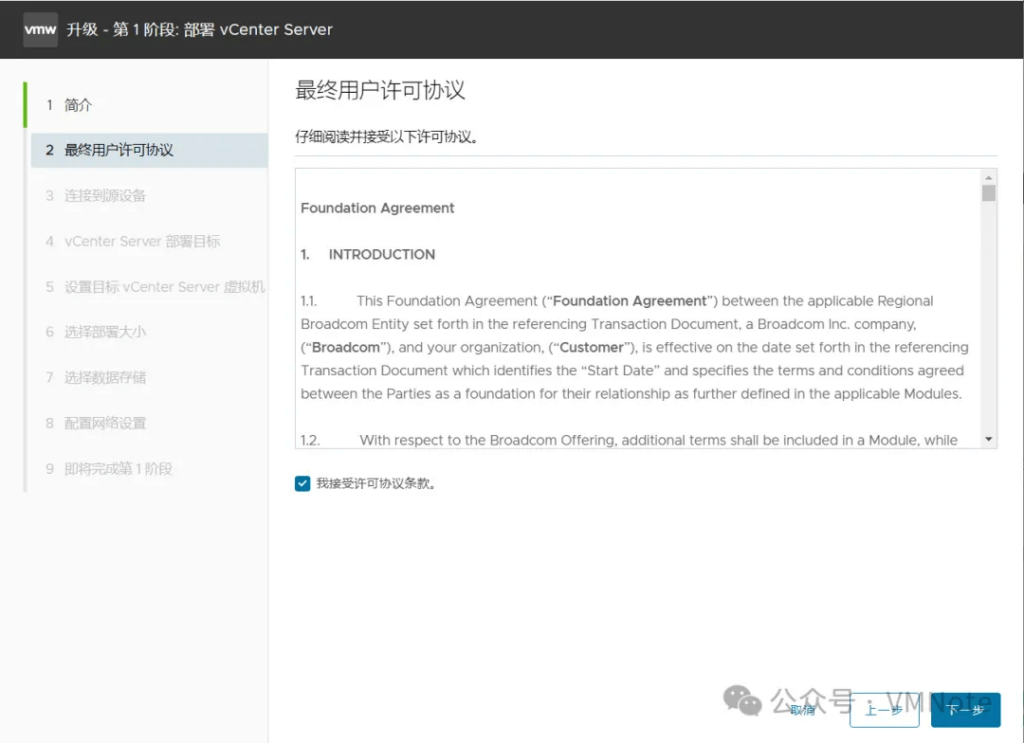
第6步,在 最终用户许可协议 页面,阅读最终用户许可协议,然后 勾选 我接受协议条款复选框,并点击 下一步
第7步,在 连接到源设备 页面,输入现有vCenter Server 7的域名(FQDN),然后点击 连接到源
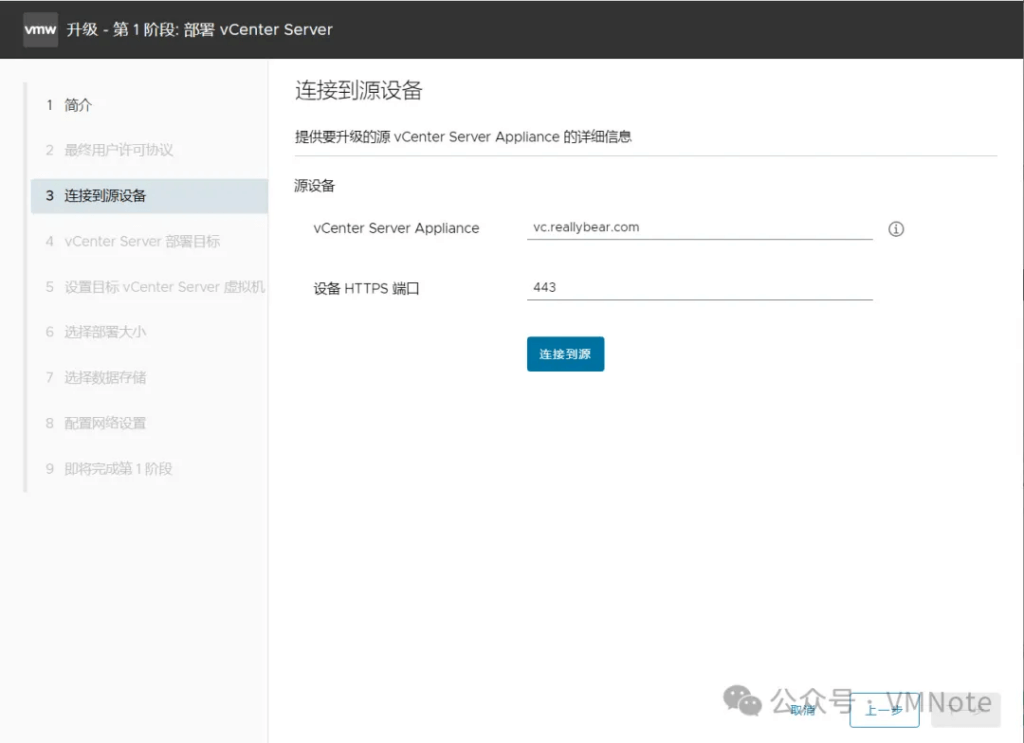
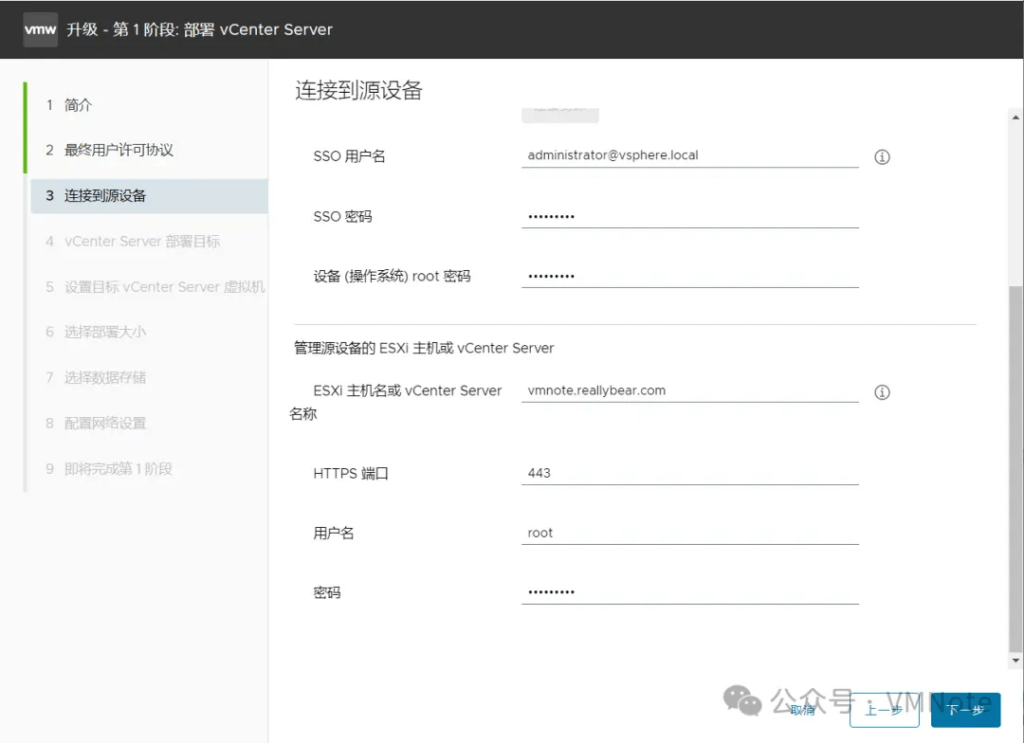
连接成功后,会要求输入现有vCenter Server 7 单点登录(SSO)管理员账户和密码以及所在ESXi主机的域名(FQDN)、管理员账户和密码

注意:根据实际情况填写上述内容,尽量使用域名(FQDN)而不是IP地址,填写完毕后,点击 下一步。
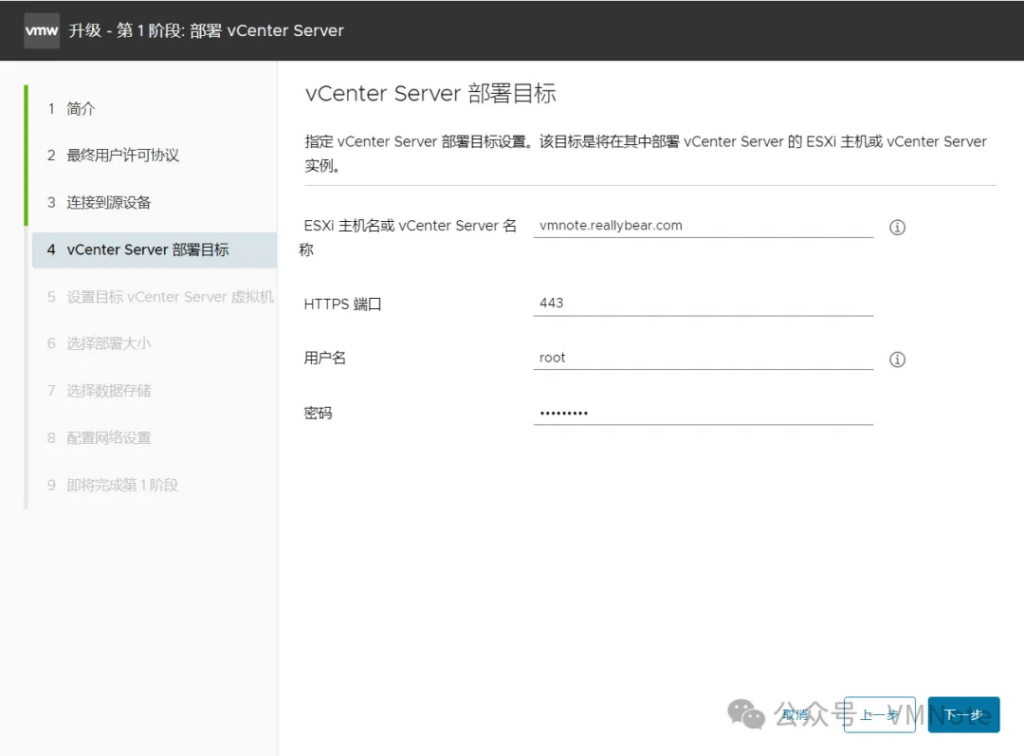
第8步,在 vCenter Server部署目标 页面,输入ESXi主机的域名和账户密码
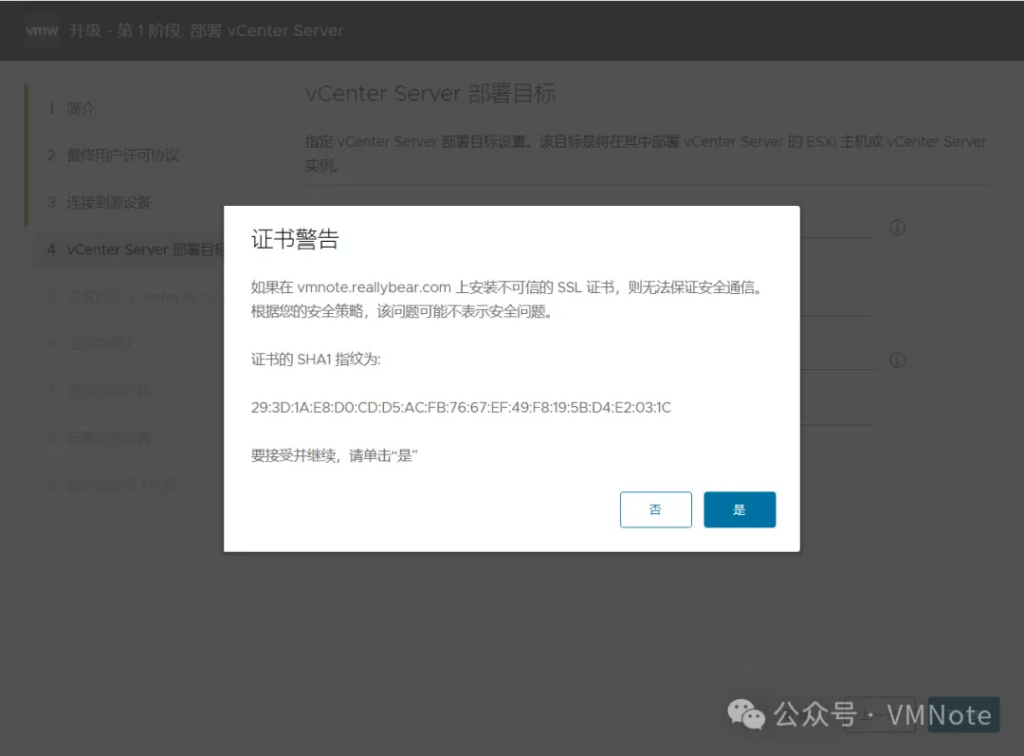
第9步,在弹出的ESXi SSL证书警告页面,点击 是 按钮
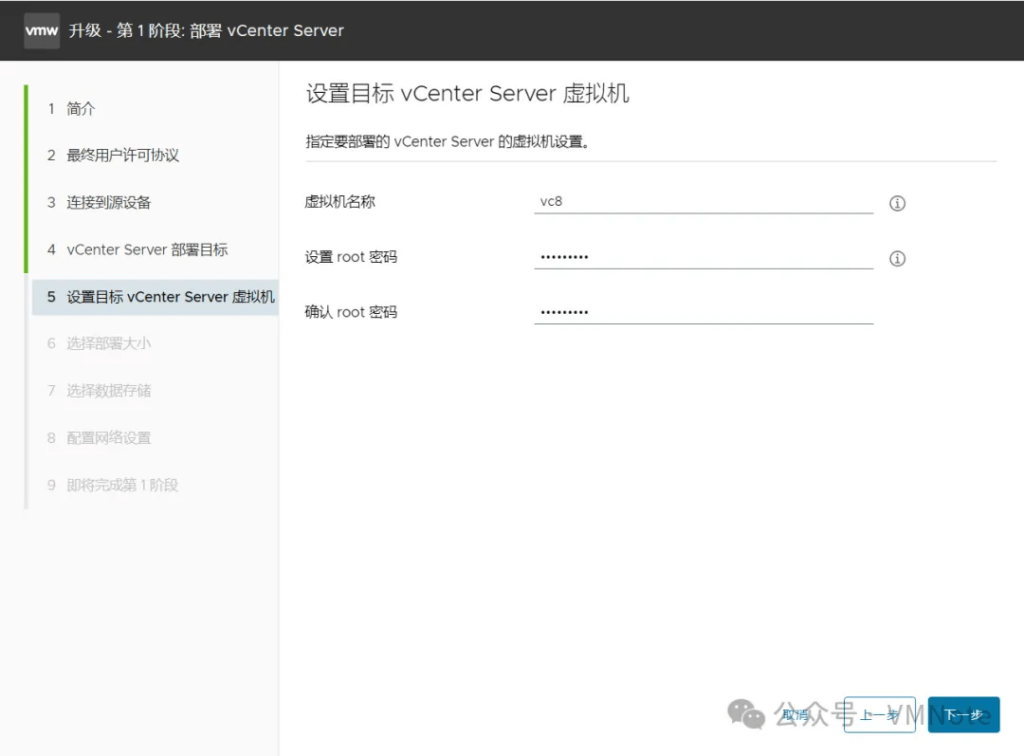
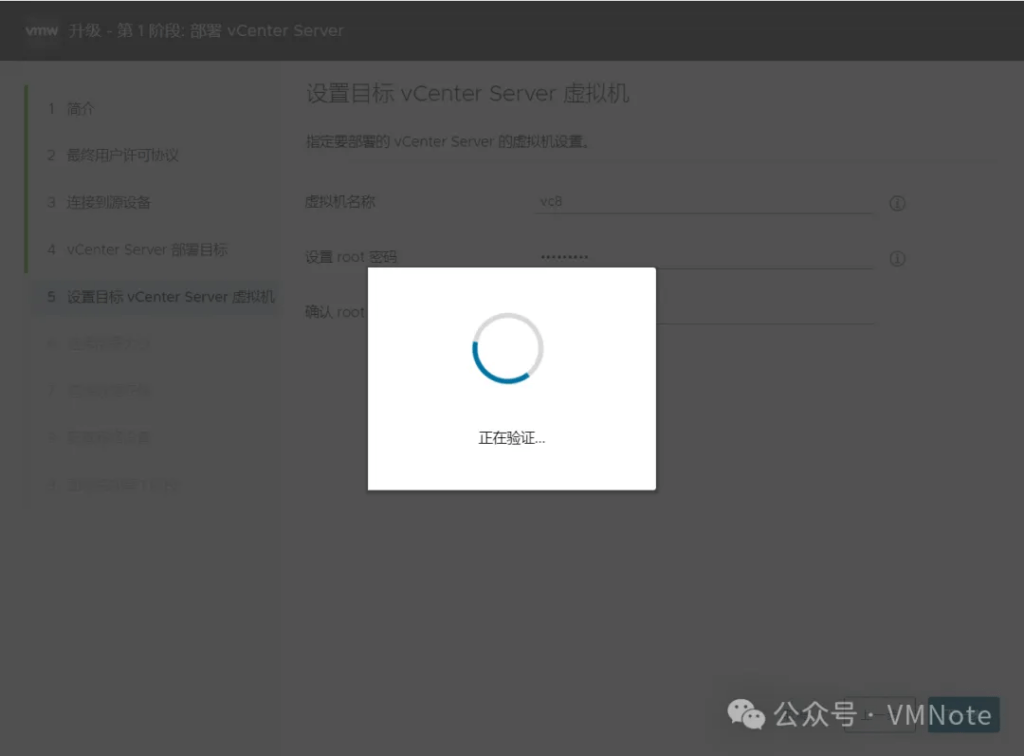
第10步,在 设置vCenter Server虚拟机 页面,配置 vCenter Server 8 虚拟机的名称及root账户的密码,然后点击 下一步注:密码要求相对比较高,需要8~20个字符,要求包含4种字符(大小写字母,数字,特殊字符),推荐设置和旧的vCenter Server一样,避免太多密码记乱了。
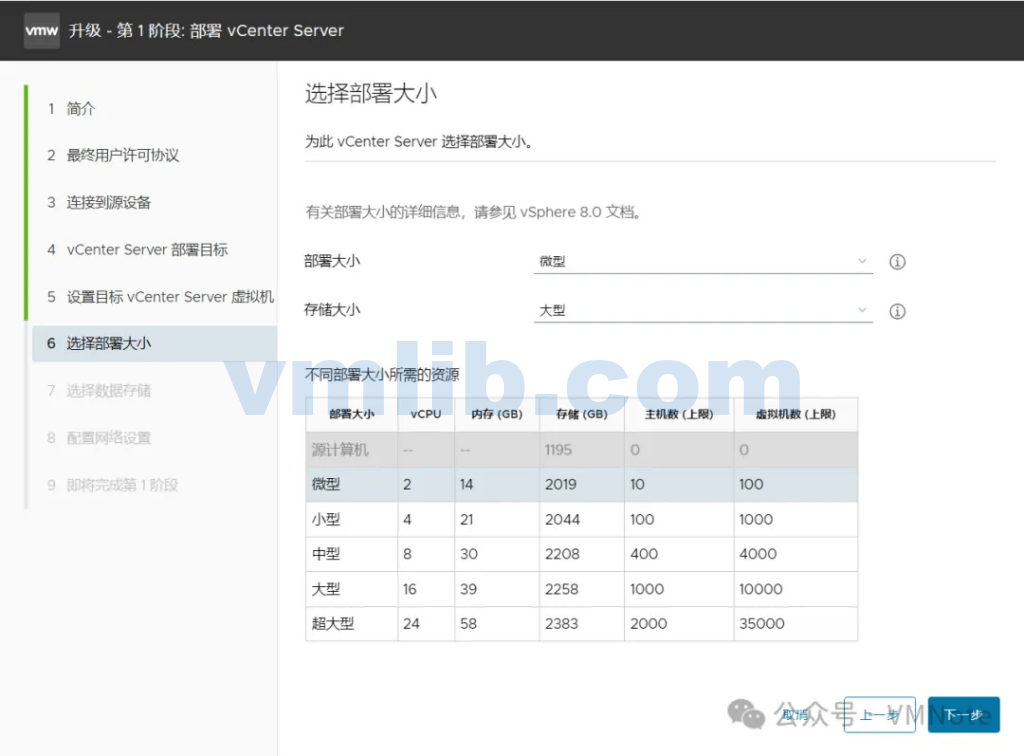
第11步,在 选择部署大小 页面,根据实际情况选择vCenter Server 的部署规模并点击下一步
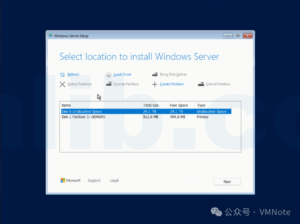
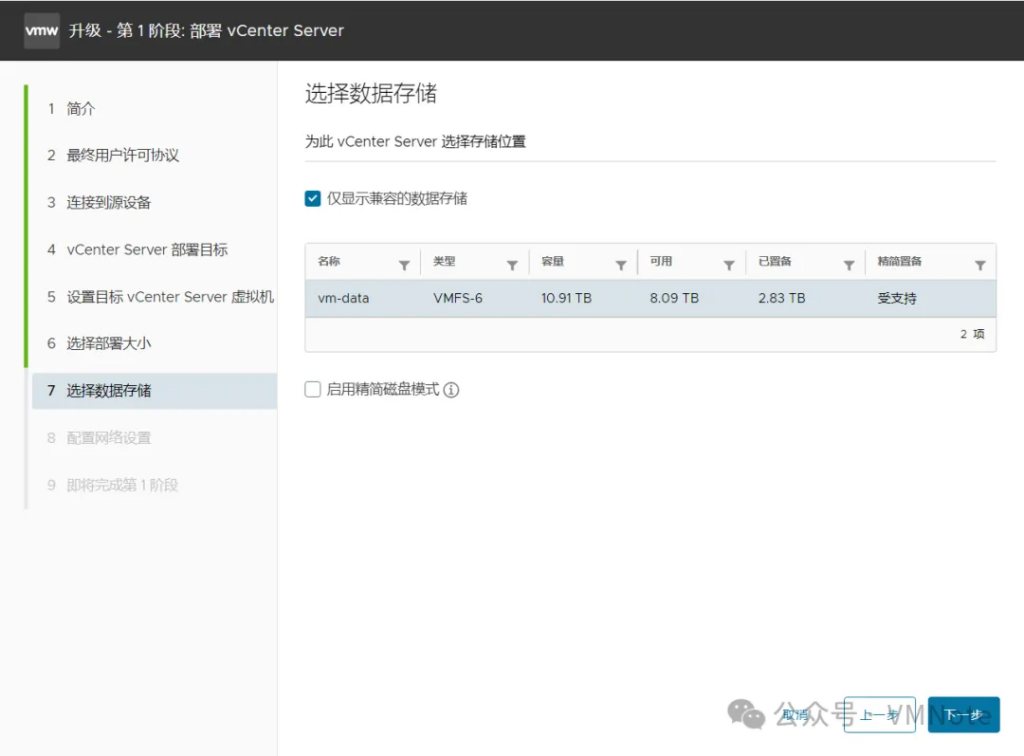
第12步,在 选择数据存储 页面上,选择需要将vCenter Server放置的存储位置,并点击下一步
第13步,在 配置网络设置 页面,输入分配给新vCenter Server的临时P地址等参数,然后点击 下一步

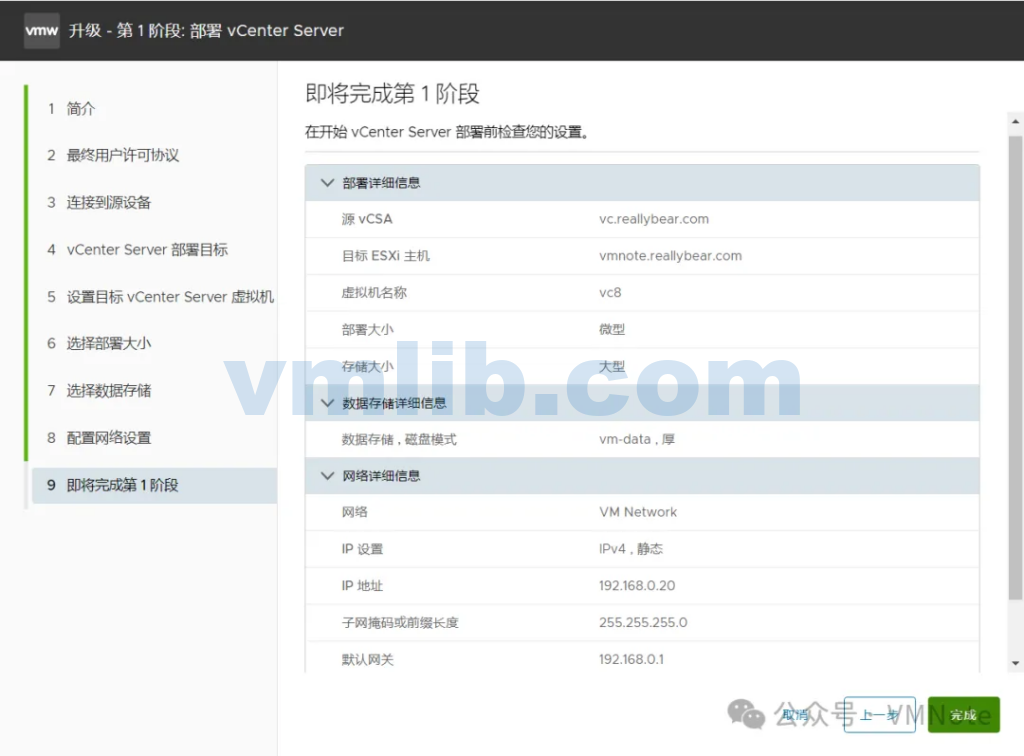
第14步,在 即将完整第1阶段 界面,检查设定无误后点击 完成 按钮
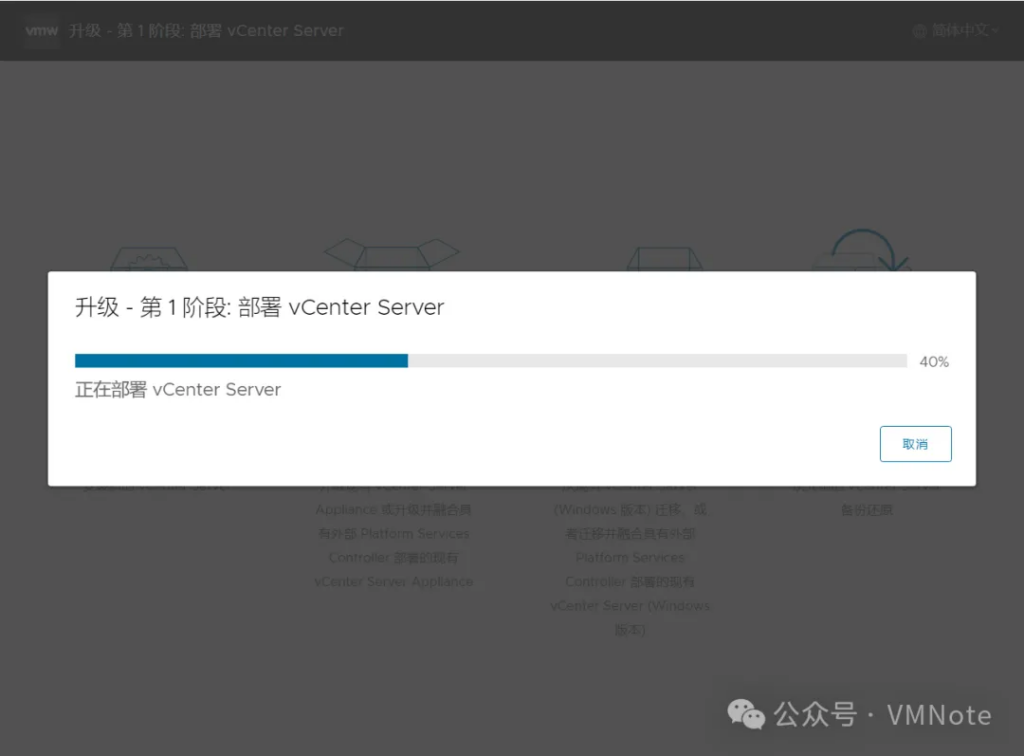
注:第一阶段的部署的是将个人电脑上的vCenter Server Applicance 的OVA文件推送到ESXi主机上,因此部署时间长短取决于ESXi主机的性能以及网络的速度。
VCSA升级的第二阶段
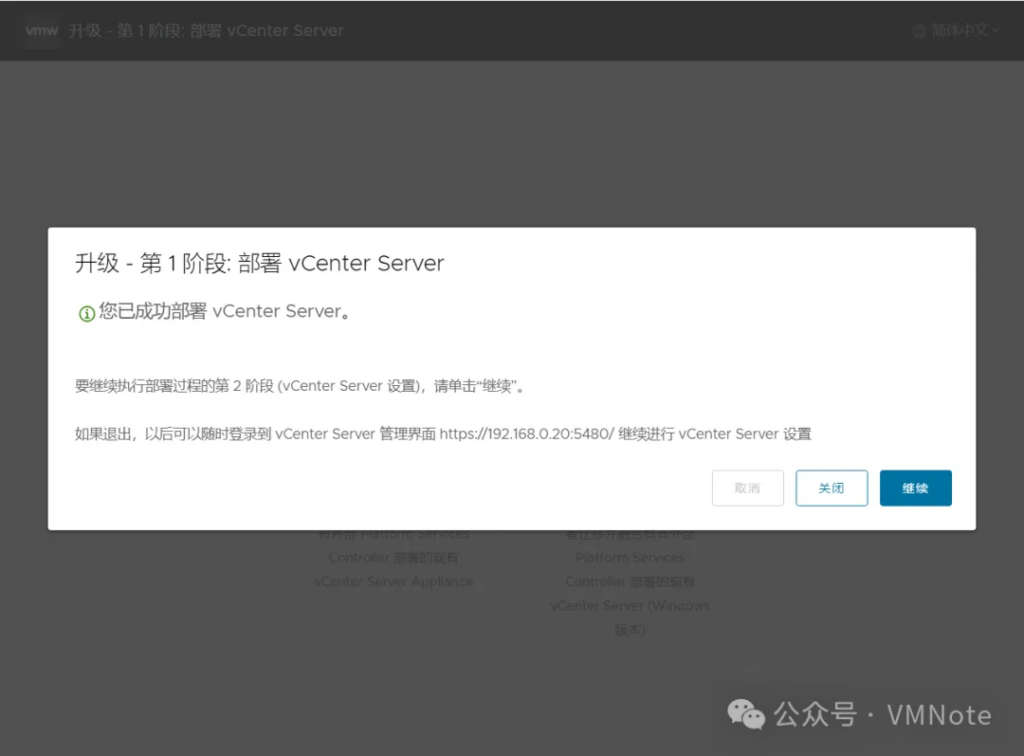
第1步,在弹出 第1阶段部署完成 页面上,点击 继续 进入 第2阶段的部署
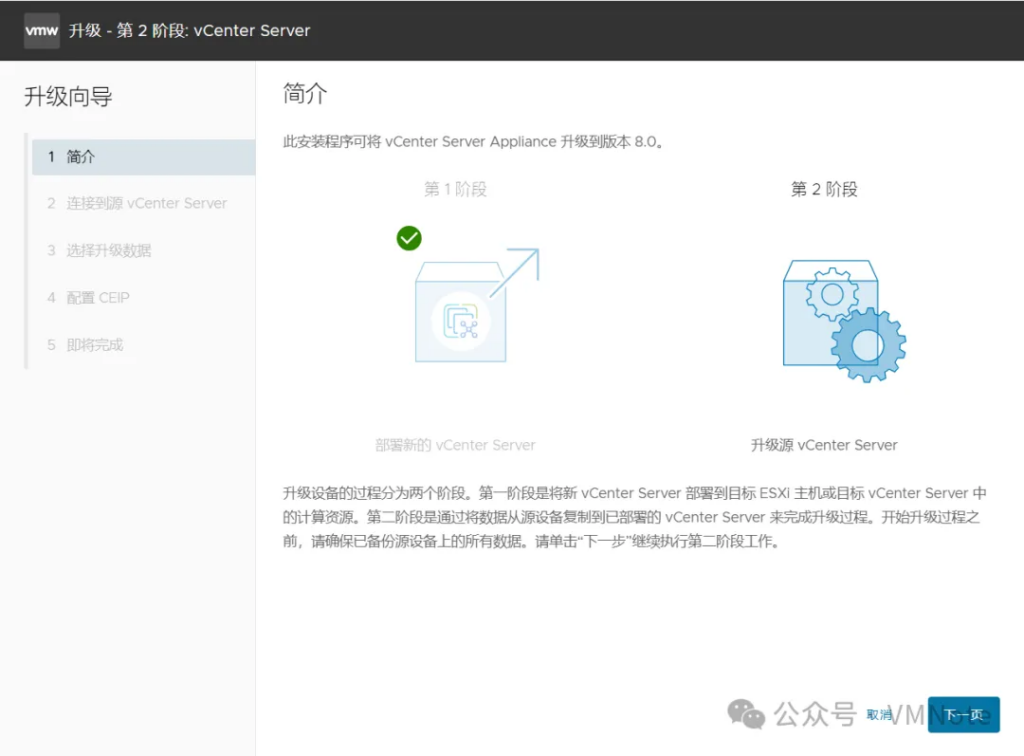
第2步,在 简介 页面,单击下一步
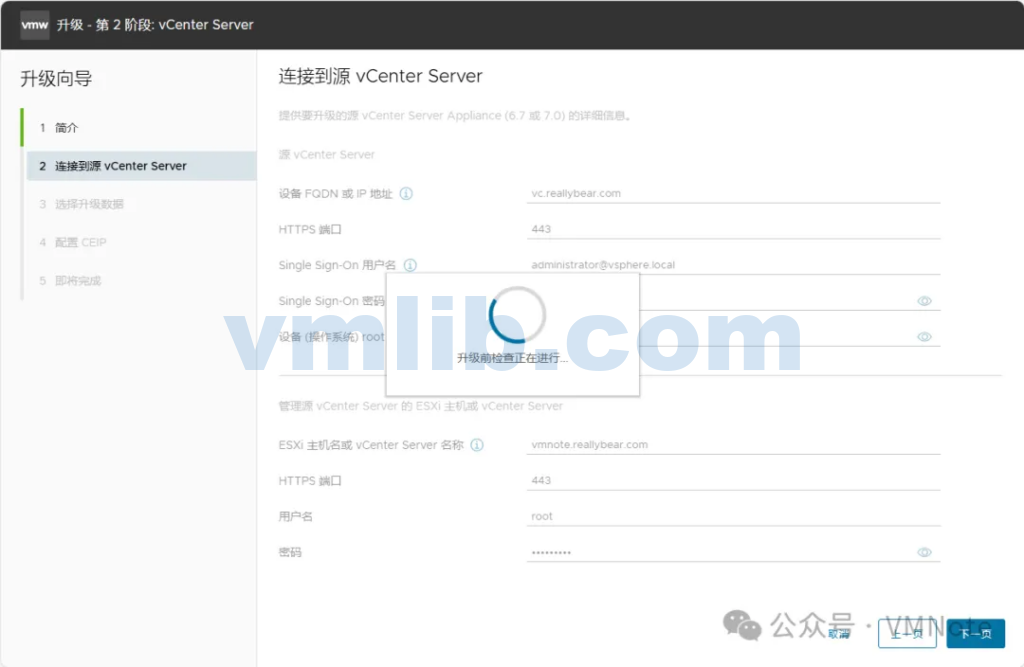
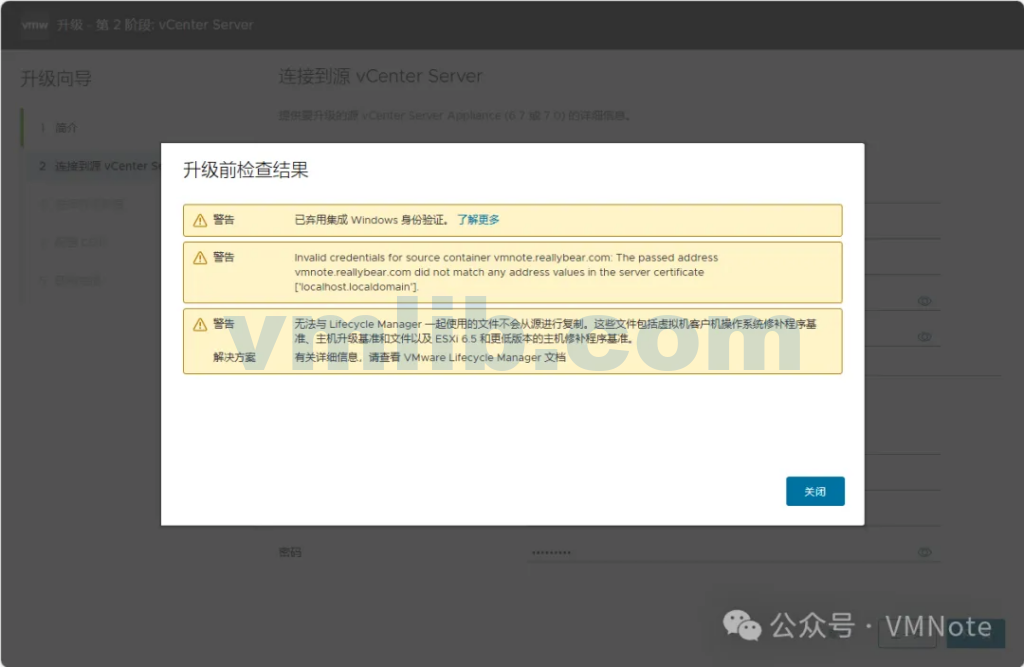
第2步,在 链接到源vCenter Server 页面,根据提示输入旧vCenter Server 7 的域名、管理员账户密码以及旧vCenter 所在的ESXi主机的域名、管理员账户密码后,安装程序将在旧vCenter Server 上运行升级前检查
第3步,在弹出的升级检查结果页面,点击 关闭 ,并点击 下一步
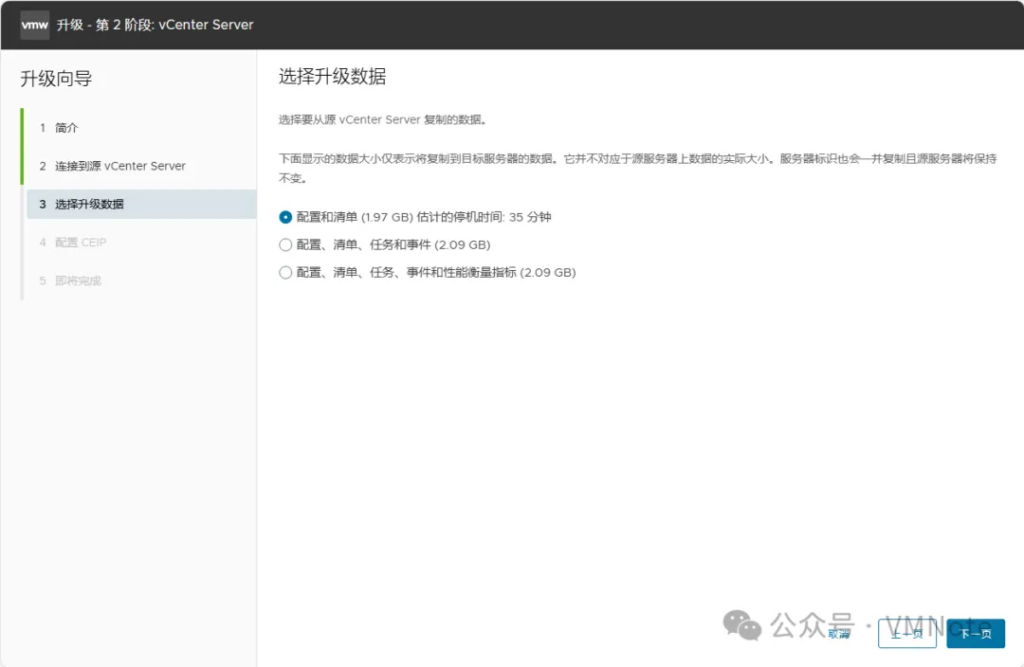
第4步,在 选择升级数据 页面,选择要将旧vCenter Server 7上的哪些数据导入到新vCenter Server 8 中
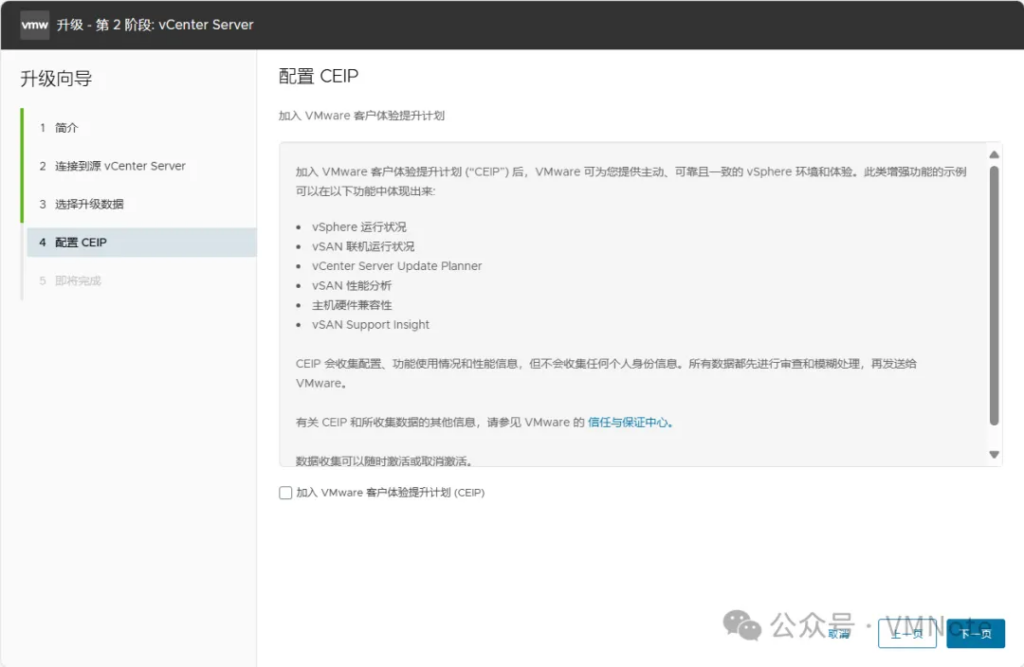
第5步,在 配置CEIP 页面,根据实际情况选择是否加入客户体验提升计划(CEIP),然后点击 下一步
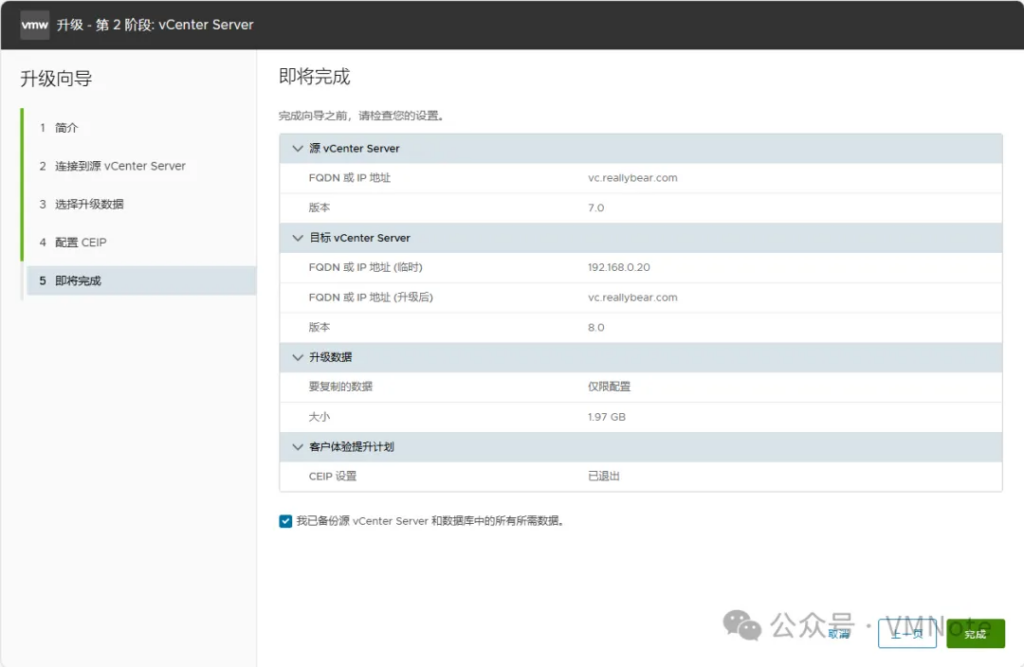
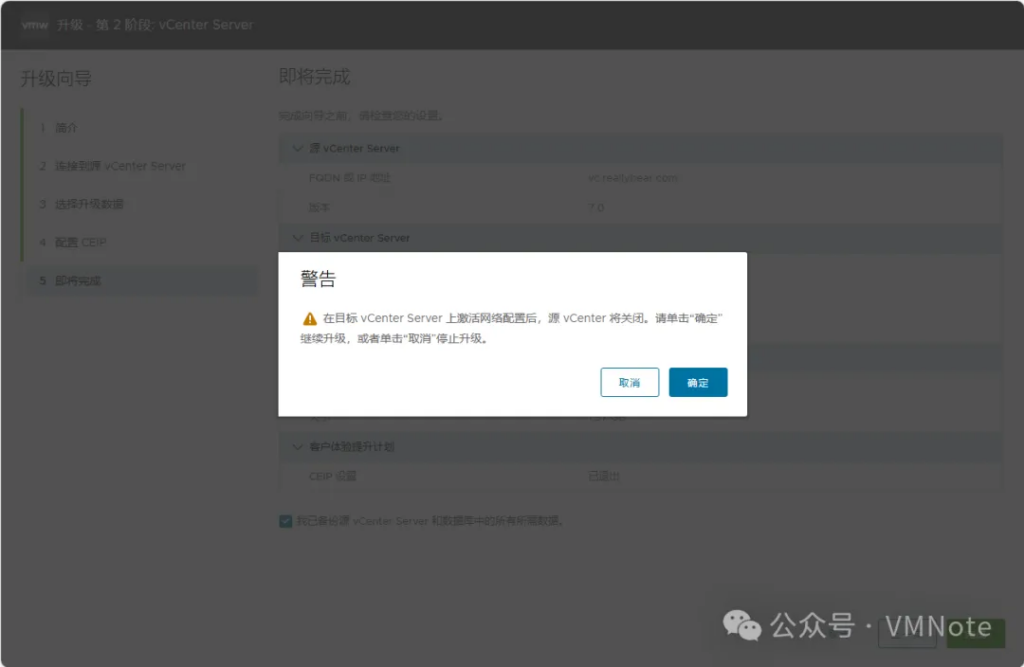
第6步,在 即将完成 页面,检查设定无误后点击 完成
第7步,在弹出的 警告 页面,点击 确定
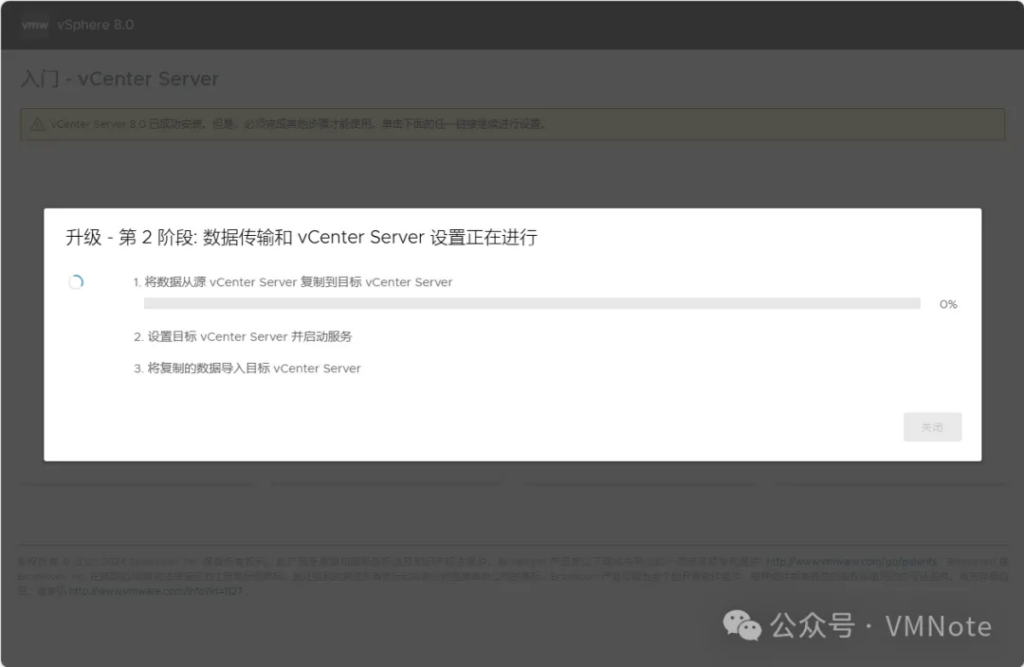
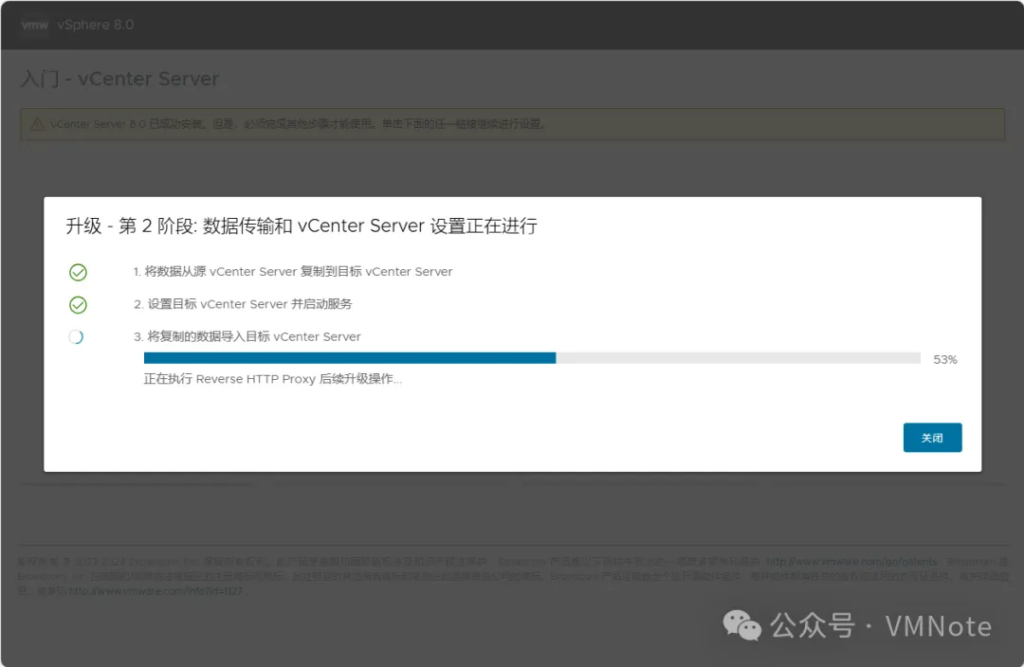
第8步,第2阶段升级中,升级完毕后点击 关闭
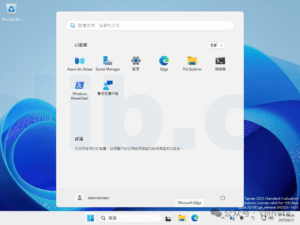
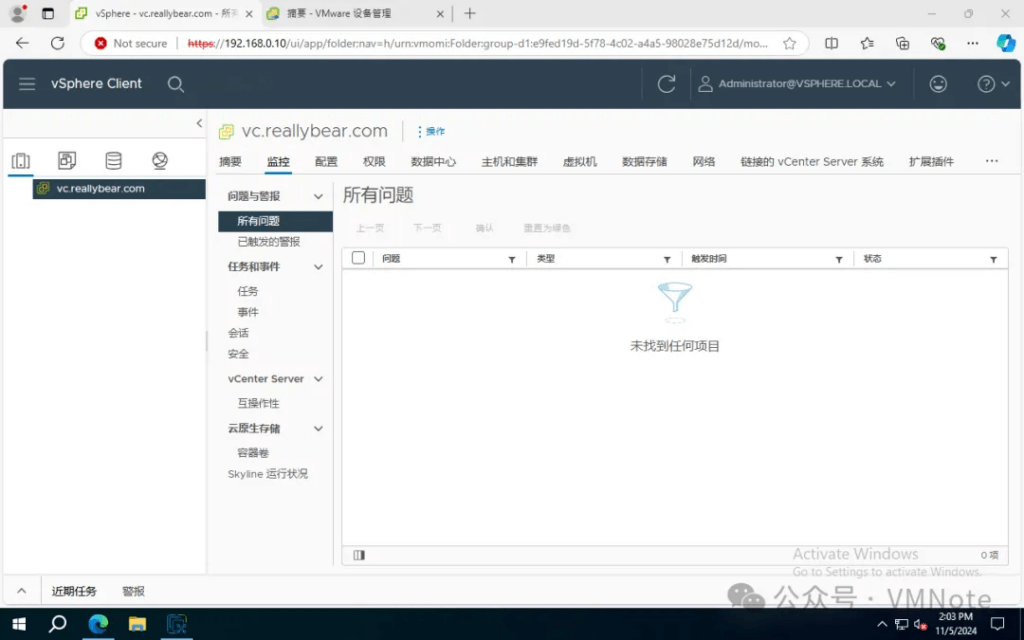
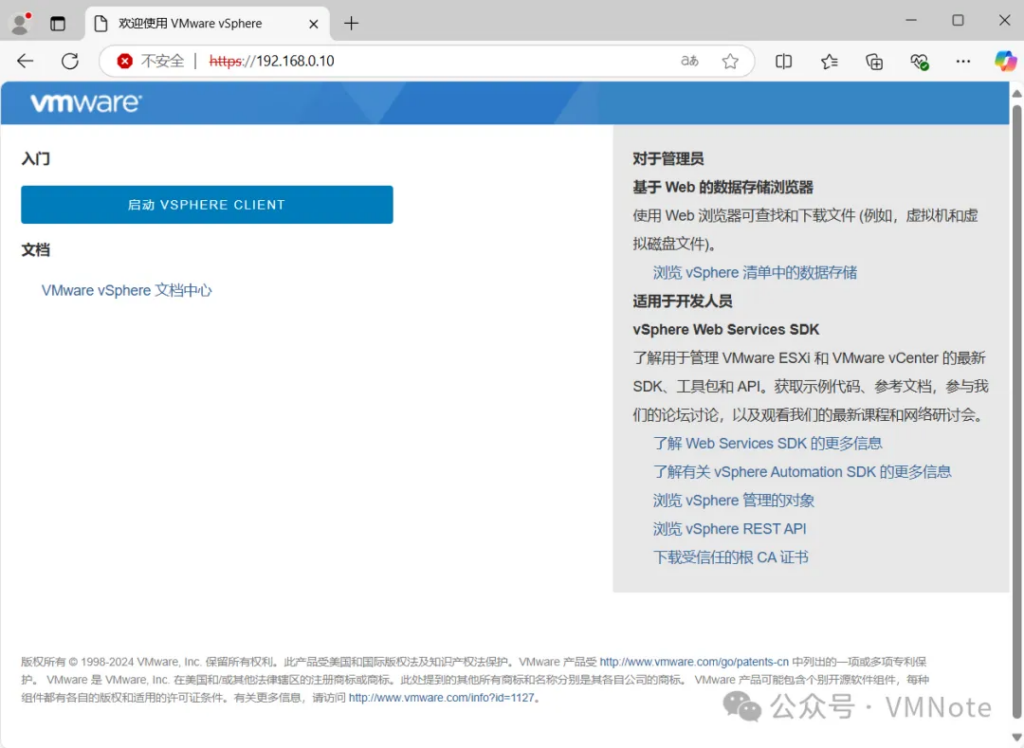
第9步,访问vCenter Server的域名或IP地址,并根据提示登录后,确认vCenter Server升级成功。
运行两周观察看下,若没有问题的就可以把旧的vCenter Server 7删除
VCSA升级的常见问题
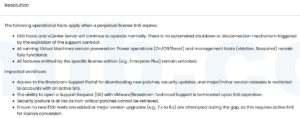
1. 在第2阶段的第2步连接到源vCenter Server 失败,提示“升级前检查失败,原因是出现以下问题:Error in method inbocation[Error 1] unkown host
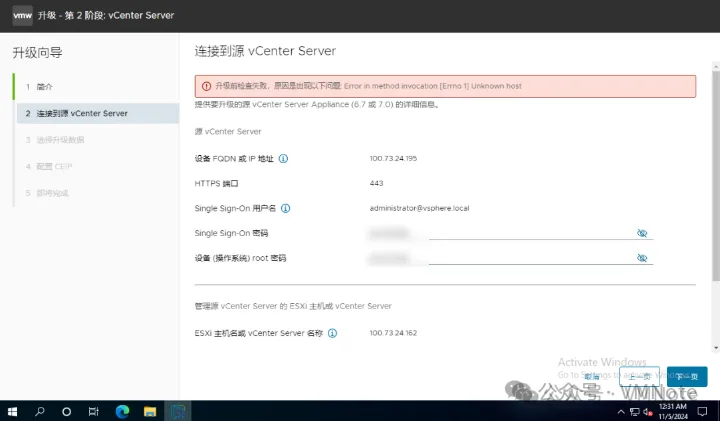
根本原因:旧的vCenter 使用的是IP部署的
解决方案:将旧vCenter 分配域名并创建好IP和域名的正反解析后问题解决。
2. 在第2阶段的第2步连接到源vCenter Server 失败,提示“升级前检查失败,原因是出现以下问题:Error in method inbocation[Error none] unable to connect to port 22 on 192.168.0.10”

根本原因:旧vCenter Server的SSH服务未开启
解决方案:开启旧vCenter Sever的SSH服务后,问题解决。
完成 VMware vCenter Server 的升级后,别忘了验证服务是否正常运行,同时定期检查系统的健康状况。升级到 8.0 版本不仅能享受性能优化,还能体验到更多实用的新功能,比如更好的兼容性和安全性。无论是日常维护、扩展虚拟化环境,还是优化现有 IT 架构,vCenter Server 都是不可或缺的工具。如果你对升级步骤、数据中心管理或者虚拟化有更多兴趣,欢迎多看看相关技术资料,或者继续关注本博客获取更多 VMware 实用教程和技巧!
如果有任何问题,欢迎联系我们交流,我们也有VMware技术交流群,可以加我们小助手添加进去。


 VM技术助理